

Which makeup brush is used for what? A beginner's guide
A round brush, an angled brush, a small flat brush: which do you use when? This overview helps you recognise the main shapes and choose tools that suit your makeup.
Which makeup brush is used for what? A large, fluffy brush distributes powder; a medium-sized soft brush builds blush or bronzer. A dense brush applies foundation or concealer precisely. Choose a smaller head for highlighter. A flat eyeshadow brush applies colour, while a soft blending brush softens the edges.
The name on the handle is a guide: also consider the shape, size, bristle density and product texture.
Recognising makeup brushes: what does each shape do?
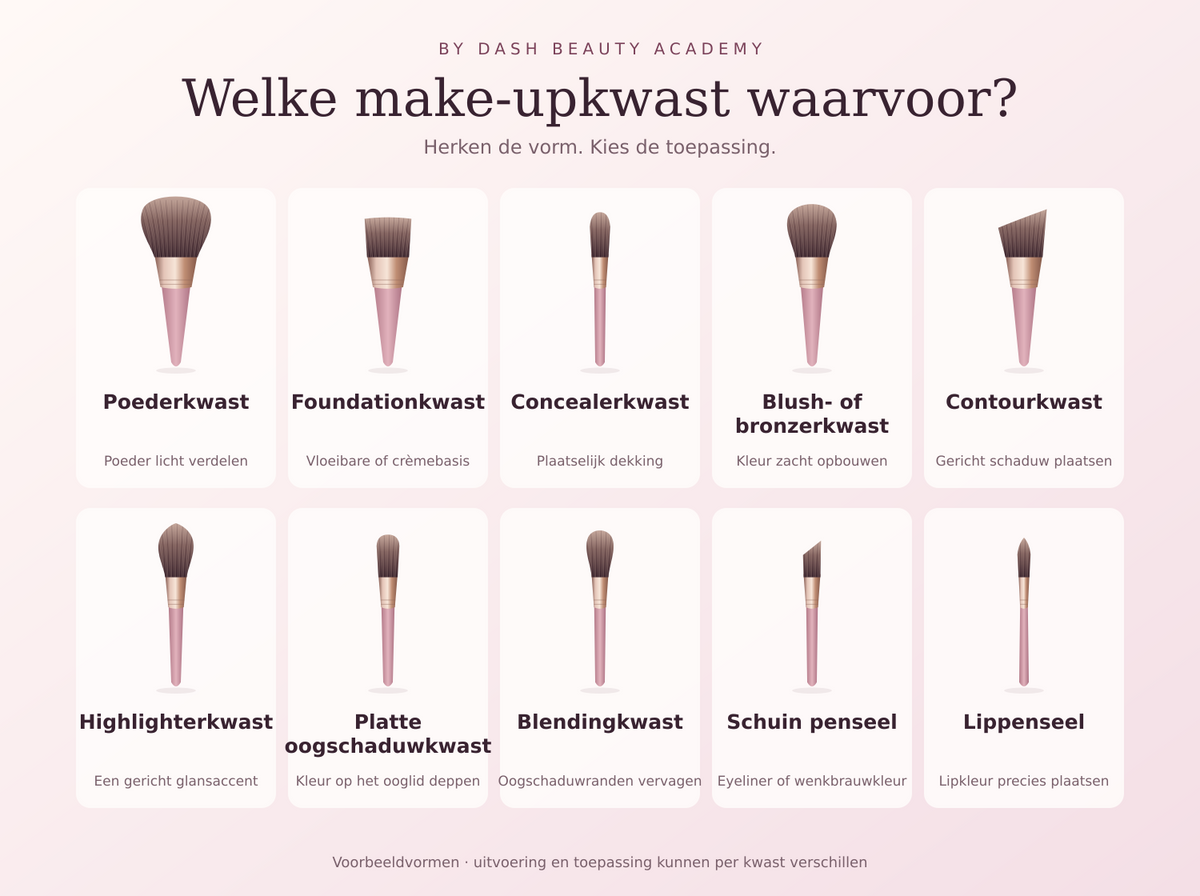
This overview shows example shapes. A highlighter brush does not have to be a fan, for instance: a small round or tapered head can work too. Designs vary by brand.


Schematic illustrations of general brush shapes. The product photo below shows the actual By Dash Beauty highlighter brush.
| What do you want to apply? | Useful starting point | What should you consider? |
|---|---|---|
| Powder | Large, fluffy powder brush | Pick up a little for a light layer. |
| Liquid foundation | Dense synthetic brush | Work thinly and blend the outer edge. |
| Concealer | Small, firm brush | Dab precisely; keep coverage where wanted. |
| Powder blush or bronzer | Soft, medium-sized brush | The head should suit the area you are colouring. |
| Highlighter | Small round, tapered or fan brush | Choose a head that keeps shine targeted. |
| Eyeshadow | Flat brush + soft blending brush | Dab colour on, then blend the edge. |
On a small screen, scroll the overview horizontally.
Which makeup brushes do beginners really need?
You do not need a complete brush set. Start with tools for the products you actually wear. For a look with powder blush and eyeshadow, these are three practical starting points:
- A soft blush brush for colour on your cheeks.
- A flat eyeshadow brush for applying colour.
- A soft blending brush for blending eyeshadow edges.
Do not wear eyeshadow? Leave out the two eye brushes. Add a foundation brush or sponge if you use a base, and a small highlighter brush for targeted shine. An existing brush can sometimes do several jobs if its size and texture suit them and you clean it between uses.
Want to choose your routine first? See what makeup beginners need and the order to apply it.
Which brush do you use for your face?
Powder brush: large and fluffy
A fluffy powder brush distributes a thin layer of loose or pressed powder. Pick up a little, tap off the excess and work lightly where you want to set makeup. For a small area, such as beside your nose, a smaller head gives more control.
Foundation brush: choose for the formula and coverage
For liquid or cream foundation, a densely packed synthetic brush is a useful starting point. Apply small amounts and work outwards from the area where you want coverage. Flat, rounded or flat-top heads can all work; the formula, brush and technique together determine the finish.
Concealer brush: small and precise
A small dense brush helps place concealer precisely. Gently dab out the outer edge without sweeping away the whole layer. A slightly fluffier small brush may help soften the transition. Build extra coverage only where needed.
Blush and bronzer brush: soft colour transitions
A soft, medium-sized round or angled brush gives control with powder blush. A broader head may suit bronzer over a larger area. Keep pressure light and assess the first layer before picking up more product. Find all powder blush shades in our powder blushes.
For cream blush, a denser synthetic brush may help: dab colour on without pushing the base underneath around. Also read our step-by-step guide to applying blush.

Contour brush: work along a smaller area
An angled contour brush helps place a shadow precisely and blend its edge. A denser head may suit cream contour; a softer head may suit powder. Start with a little product. Softening a distinct dark stripe is harder than building a thin layer.
Highlighter brush: small enough for your desired glow
A small round or tapered brush is a useful starting point for highlighter. A fan brush is another option, for example for a light veil of powder. Choose a shape that lets you control the highlighted area.
Pick up a little highlighter and work softly over the top of your cheekbone. Check the shine from different angles before adding more. The guide what is highlighter and where do you apply it? explains more about placement.

Which brushes do you use for eyes, brows and lips?
Flat eyeshadow brush: placing colour
Use a flat eyeshadow brush to dab colour onto the mobile lid. Keep movements small to keep colour in one place. Use a clean side or a clean brush when switching from a dark to a light shade. Find beautiful base shades in The Ultimate Nude Eyeshadow Palette.
Blending brush: softening edges
A blending brush has a fluffier, rounded head. Move along the eyeshadow edge without pressing hard. A clean brush without fresh colour is useful when you only want to soften the transition. Choose a smaller style for a small crease.
Have little visible lid space? See our guide to eye makeup for hooded eyes for placement with relaxed, open eyes.

Angled brush: eyeliner or brow colour
The thin angled edge helps draw a line along the lashes or fill brows precisely. Choose a formula suitable for the purpose. Use a clean brush when switching products and work carefully around the eyes. An eyebrow brush, also called a spoolie, combs the hairs and serves a different purpose.
Lip brush: precise colour application
A small, firm lip brush gives control along the lip line and at the corners. It is optional: many lip products already have an applicator. For a defined outline, you can also start by applying lip liner. Choose a suitable shade from our lip liners.
Synthetic or natural bristles: which should you choose?
Synthetic bristles are artificial fibres; natural bristles come from animals. Synthetic brushes are available for liquid, cream and powder products. You do not automatically need animal hair for powder.
Also consider softness, resilience and how densely the bristles are packed. One synthetic brush may be fluffy and flexible, another dense and firm. Want a fully vegan product? Check the manufacturer's information; bristle colour or softness alone cannot tell you.
Makeup brush or beauty blender: what is the difference?
A brush lets you place, dab or blend product precisely. A makeup sponge presses the base into place and softens transitions. Neither is automatically better for every formula or desired finish.
Using a sponge intended for damp use? Wet it and squeeze it out thoroughly as directed. Try both techniques with a little product. You can also use a brush first, then a clean sponge to refine the edges. See our guide to cleaning a beauty blender.
Streaks or patches? First check that your brush is clean, use less product and reduce pressure. Powder may apply unevenly over a still-sticky base. Let the base set, then try again with a thin layer.
How do you clean makeup brushes?
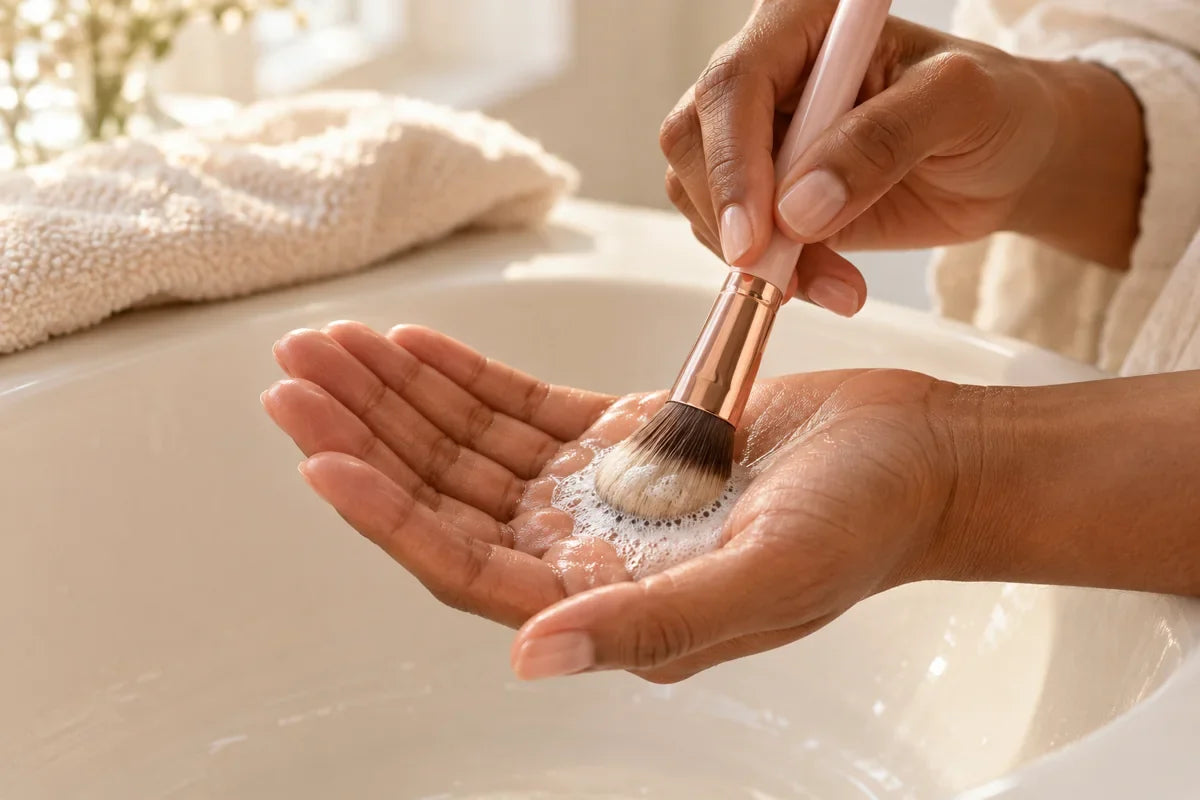
The American Academy of Dermatology recommends washing makeup brushes every 7 to 10 days . Also follow the care instructions for your brush and cleaner. Do not use a brush with visible old product residue.
- Rinse the bristle tips with lukewarm water. Do not submerge the ferrule or handle.
- Gently clean the bristles with a suitable brush cleaner according to its instructions, or a mild shampoo.
- Rinse until the water runs clear. Gently press out excess moisture with a clean cloth.
- Reshape the bristles and let the brush dry flat, with the head hanging freely over an edge. Store only when completely dry.
Source for washing frequency and drying method: American Academy of Dermatology: cleaning makeup brushes.
Frequently asked questions about makeup brushes
Can you use the same brush for blush and bronzer?
Yes, if the shape and size work comfortably for both. Clean it between products to limit colour mixing. If you use both daily, separate brushes are more convenient.
Do you need a separate primer brush?
Not always. Many primers can be spread with clean fingers according to their instructions. A separate brush is a choice, not an essential in every beginner's kit.
What is the difference between an eyeshadow brush and a blending brush?
A flat eyeshadow brush is intended to apply colour precisely. A fluffy blending brush helps soften the edges. Some brushes can do both, but two separate brushes make it easier to practise placing and blending colour independently.
Does a highlighter brush have to be a fan brush?
No. A small round or tapered brush can also work. Choose according to the highlighter formula, the area you want to brighten and the amount of control you prefer.
When should you replace a makeup brush?
There is no fixed replacement interval for every brush. Check for a loose ferrule, sharp damage, persistent shedding or a permanently misshapen head. Replace a brush that is damaged or can no longer be cleaned properly.
Start with one brush and one technique
Choose a brush suited to the product you want to practise. Apply a little first, check the placement, then blend the edge. For the next step, practise blush, highlighter or the complete beginner's routine.


1 comment
hy3um4
★ 00 ★ PROMOCODE ☆➜ https://www.google.com/share.google?q=suRUCJizhzdEsUmqa?hs=e17c51029c6ec835124c0b75b16a1970& ⇐ READ MORE / REF #E8259
Leave a comment
This site is protected by hCaptcha and the hCaptcha Privacy Policy and Terms of Service apply.